Set up your team — the admin's first hour
You're the admin. The workspace is empty. Your team is waiting.
There's a right order to do this. Skip it and you'll hit walls — you can't assign a user to a department that doesn't exist yet, and you can't invite members cleanly until the structure is ready. Follow this page top to bottom and you'll have a working team setup inside sixty minutes.
1. Create departments first
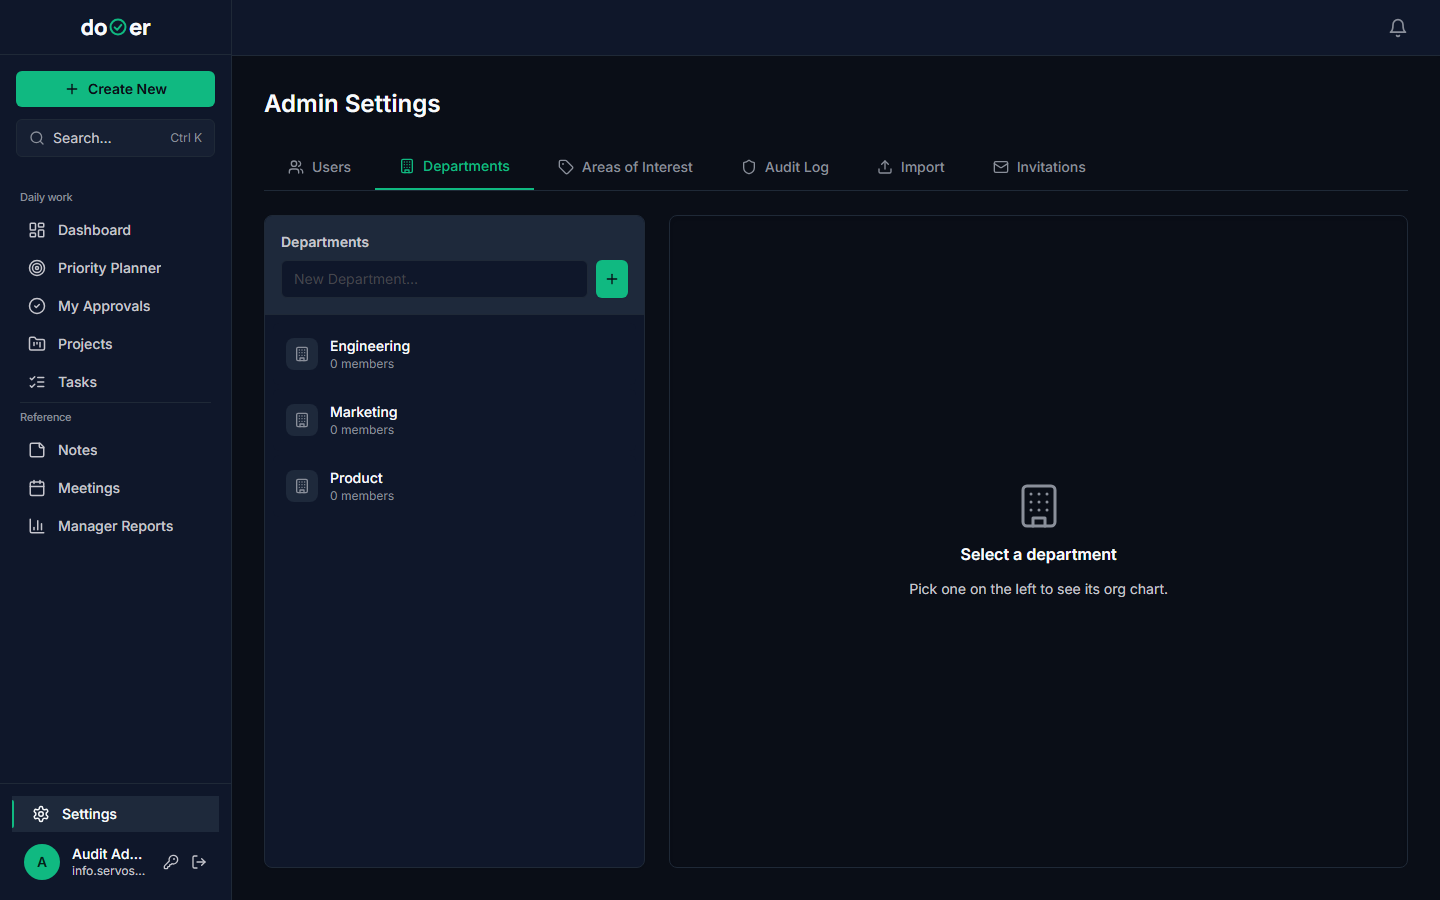
Go to Settings → Departments. Create your departments before you touch anything else.
Two things depend on departments existing:
- Projects must belong to a department. You can't create a project without one.
- Users get assigned to a department when they join. If the department doesn't exist, you have to go back and fix it later.
Three to five departments is the right size for most teams. Don't over-engineer this. If your company has Marketing, Operations, Finance, and Tech — those four names are enough to start. You can add more later. Renaming is always possible.
One department per line. No special syntax. Click Save after each one.
Remember
Departments first, always. Every other setup step depends on them existing.
2. Invite your first members
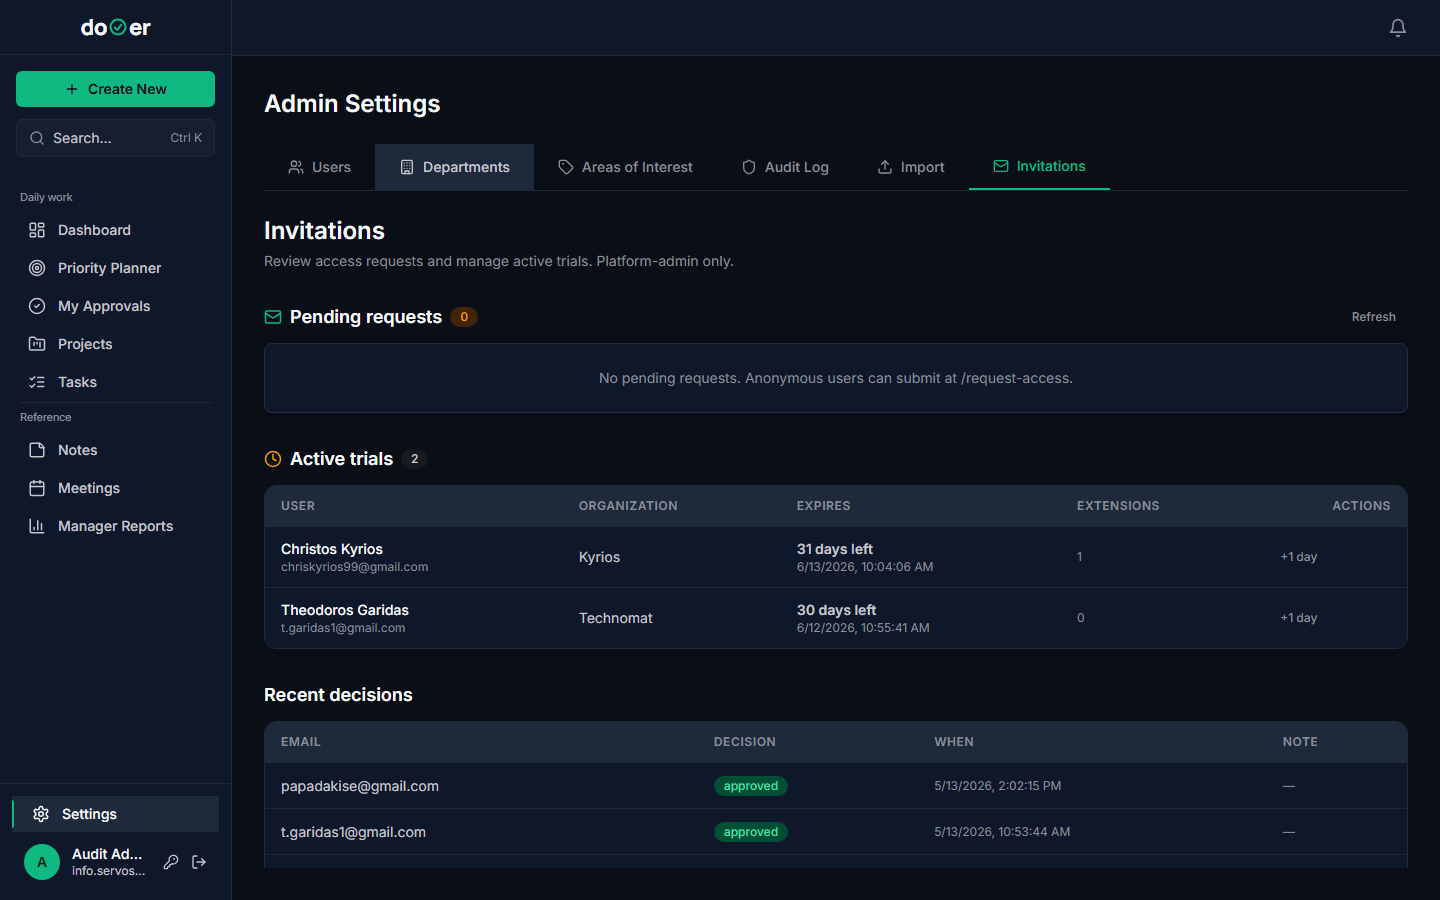
Go to Settings → Invitations. This tab is visible to HEADs only.
For each person you want to invite:
- Enter their email address.
- Choose their role — MEMBER is the default for most people. DIRECTOR and HEAD unlock audit and import access (more on that below).
- Pick their department — this is why you created them first.
- Click Send Invitation.
dooer sends them an email with an acceptance link. That link expires after 7 days. If someone misses the window, come back to this tab and resend it. The old link dies the moment you resend.
If you've turned on self-service join requests, members can also request access themselves. Those requests land in Settings → Join Requests. You approve or decline them from there. Approving a request sends them the same acceptance email as a direct invite.
Heads up
Invitation links die after 7 days. Check back on day 8 for anyone who hasn't signed in yet — they'll need a fresh link.
3. Set Areas of Interest
Go to Settings → Areas of Interest.
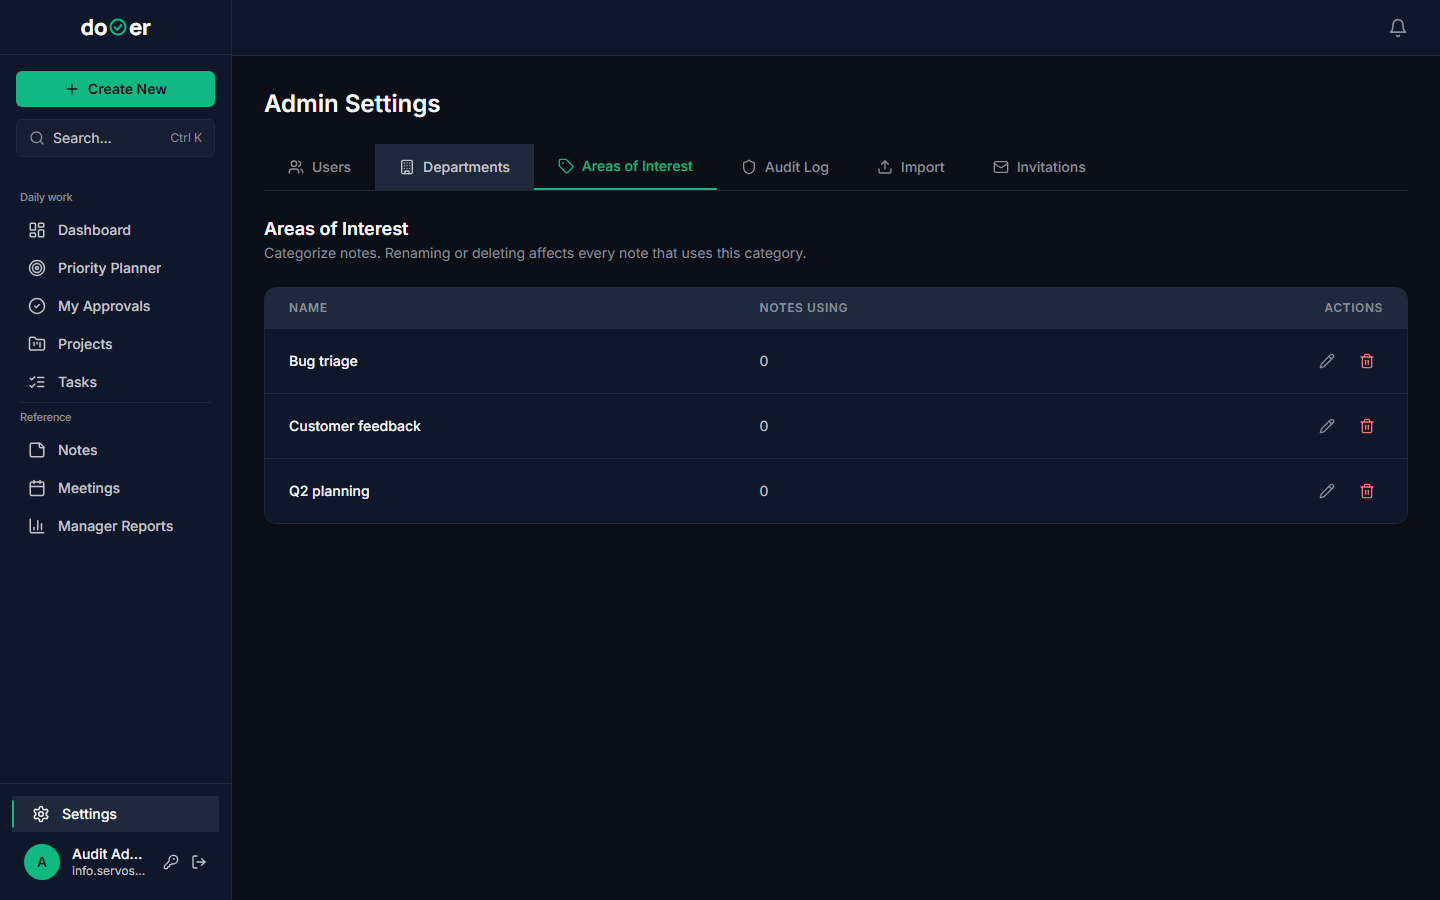
Areas of Interest — AoI for short — are filter labels. They attach to tasks and notes so team members can quickly narrow down work that's relevant to them.
Think of them as topic tags for your workspace. Examples: Customer Onboarding, Infrastructure, Compliance, Product Roadmap. They're not mandatory on every task, but the more consistently your team uses them, the more useful the filters become.
Start with three to five. You can add more at any time, and they take effect immediately on any task or note you attach them to.
AoI labels are workspace-wide. Everyone sees the same list. Keep the names short and unambiguous — "Dev" is better than "Development-and-Engineering-Initiatives".
Tiny rule
AoI are filters, not folders. A task can have more than one. Keep the list short enough that people actually use them.
4. Keep an eye on Audit Log
Go to Settings → Audit Log. This tab is only visible to users with the DIRECTOR or HEAD role.
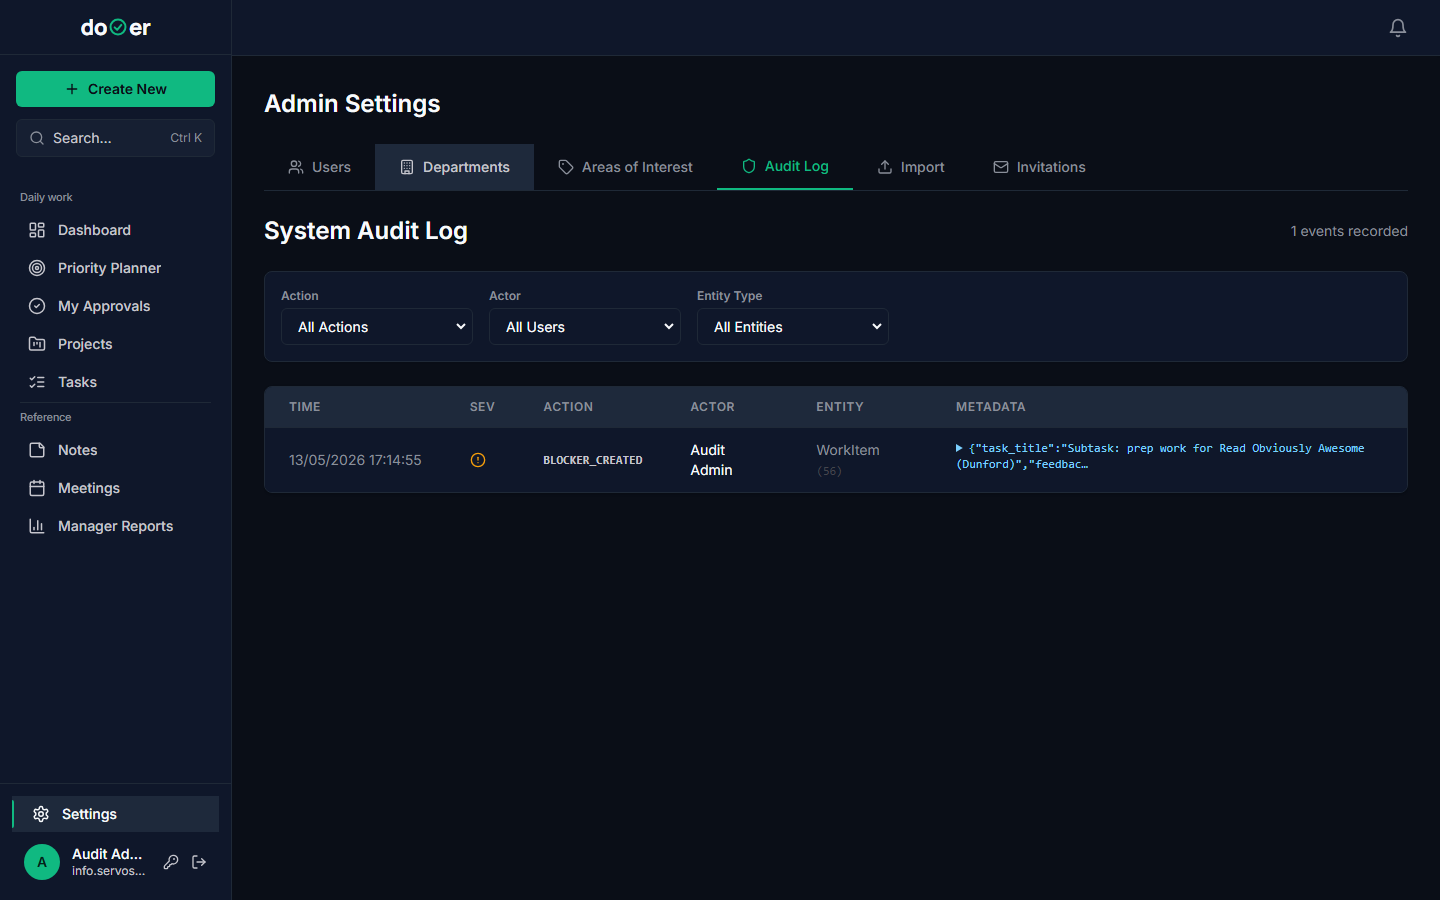
The Audit Log records every significant action in the workspace. Status changes, task reassignments, project edits, permission changes — all of it lands here automatically. You don't configure anything. It runs in the background from day one.
The most common reason to open it: "Who changed this?" A task moved to Complete and no one knows who closed it. A project name changed and the wrong department is now attached. The Audit Log answers those questions with a timestamp and a username.
You can filter by user, action type, or date range. Export to CSV if you need to share a record outside dooer.
One thing
You don't have to do anything to make the Audit Log work. It's already recording. Open it when something looks wrong and you need to trace it back.
5. Bulk-import existing work (optional)
Go to Settings → Import. This tab is only visible to DIRECTOR and HEAD roles.
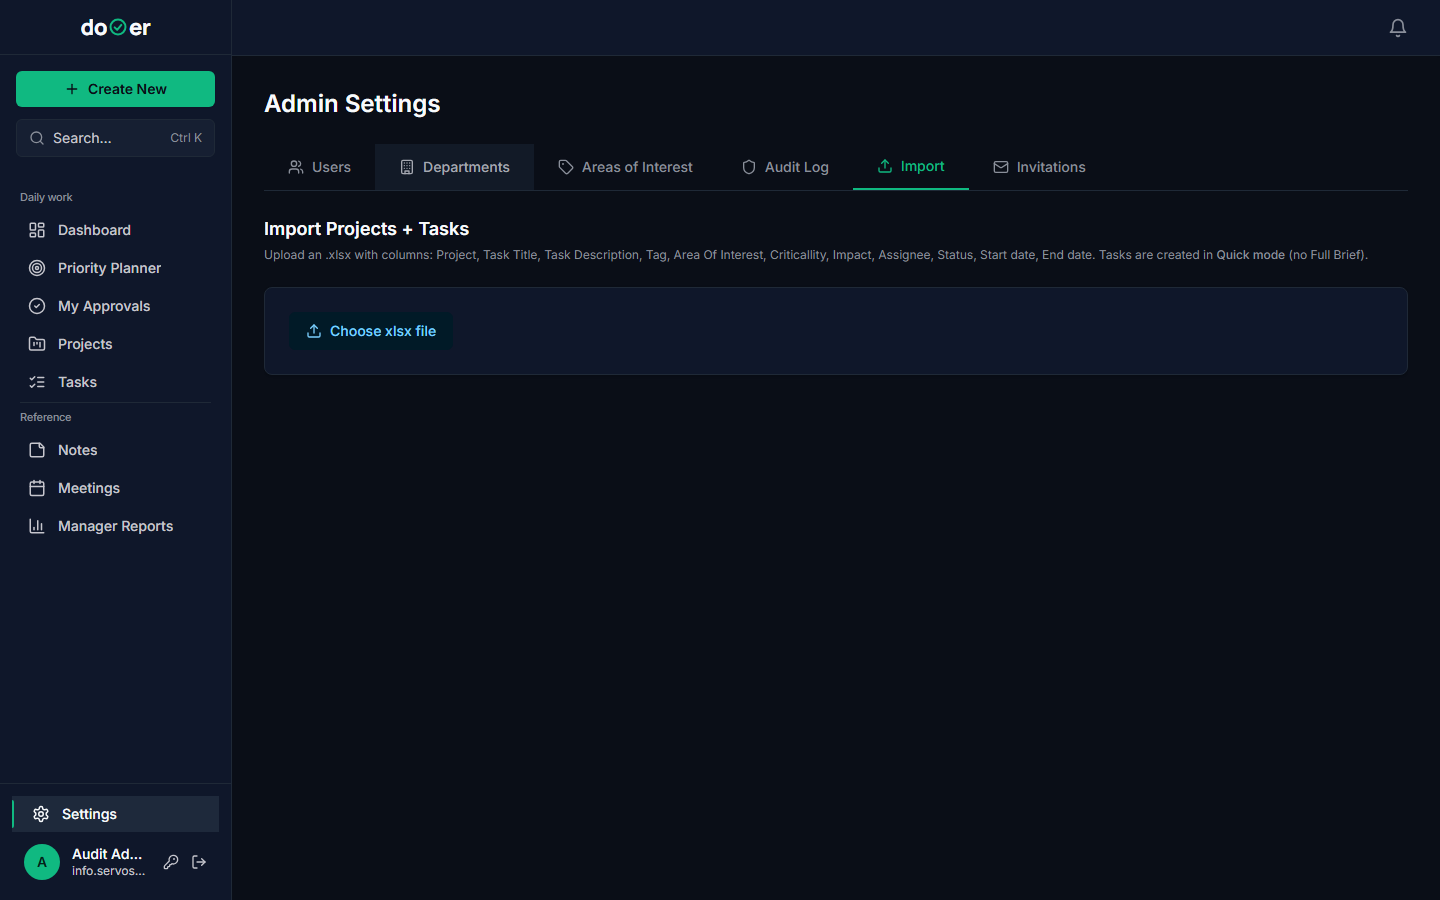
If your team is migrating from a spreadsheet — or from any tool that can export to xlsx — the import tab lets you bring that work into dooer in one step instead of creating tasks by hand.
Download the import template from the page. It has these columns in this order:
| Column | Notes |
|---|---|
| Project | Must match an existing project name in dooer. |
| Task Title | Required. Plain text. |
| Description | Optional. |
| Tag | Optional. |
| Area Of Interest | Must match an existing AoI label exactly. |
| Criticality | Optional. |
| Impact | Optional. |
| Assignee | Must match an existing user's email. |
| Status | Must match a valid dooer status name. |
| Start date | DD/MM/YYYY format. |
| End date | DD/MM/YYYY format. |
Fill the template with your existing data. Upload the file. dooer validates each row before creating anything — if a row has an unknown assignee or a project that doesn't exist, it flags that row and skips it. Fix the flagged rows and re-upload. Everything else imports cleanly.
Run the import after your departments, members, and projects are already in place. The import references them — it doesn't create them.
Heads up
Create your projects and invite your members before you import. The xlsx import looks up existing names. If they don't exist yet, those rows get skipped.
What's next
Your workspace is set up. Your team has invitations in their inboxes.
Two pages for where to go from here:
Working with your team → How to create projects, assign work across departments, and use the task board as a team-level view instead of an individual one.
Quickstart → Forward this to every new member. It takes them from invitation email to first task in ten minutes — no admin needed on your end.